Personalisierungen
- aktuelles Datum mit Tastaturbefehl hinzufügen
- Changelog verpflichtend machen mittels Tag
- DOCX Dateien per Drag&Drop importieren
- externe Links mit einem Symbol versehen
- Fußnoten über den WSYIWYG Editor
- Seite verbreitern
- Tabellenbearbeitungstools im WYSIWYG Editor aktivieren
- Tabellenüberschriften immer sichtbar beim scrollen
- Transparenz für linke und rechte Spalte deaktivieren
- Überschrift h1 in PDF Exports verkleinern
- sortierbare Tabelle im Editor
- numerierte Überschriften
- Hintergrund anpassen
- Inhaltsverzeichnis im Editor im Kommentarfeld anzeigen
- Dynamic Glossary
- Passwort beim Login mit "Auge" sichtbar machen
aktuelles Datum mit Tastaturbefehl hinzufügen
Um an der Stelle des Cursors mit einem Tastenklick das aktuelle Datum einzufügen wird folgender Code benötigt:
<script type="module">
    window.addEventListener('editor-tinymce::setup', event => {
        const editor = event.detail.editor;
        editor.shortcuts.add('f8', 'Insert Date', () => {
            const date = (new Date()).toLocaleString('de-DE');
            editor.insertContent(date);
        });
    });
</script>
Hier wird mit der Taste F8 das Datum eingefügt, es kann aber auch jede andere Funktionstaste sein.
Changelog verpflichtend machen mittels Tag
Um den Changelog zu einem Pflichtfeld zu machen muss folgender Code in die Personalisierung von Bookstack eingebaut werden:
<script type="module">
    const requiredMessage = 'Bitte geben Sie einen Changelog ein.';
    const form = document.querySelector('#main-content > form');
    const changelogInput = document.getElementById("summary-input");
    let changelogRequired = false;

    function isChangelogEmpty() {
        return changelogInput.value.trim() === "";
    }

    function checkChangelogOnSubmit(event) {
        if (!isChangelogEmpty() || !changelogRequired) {
            return;
        }

        event.preventDefault();
        window.$events.error(requiredMessage);
    }

    async function isChangelogRequired() {
        const bookSlugRegex = /\/books\/(.*?)\/(page|draft)\//;
        const slugMatchResults = bookSlugRegex.exec(window.location.href);
        if (slugMatchResults === null) {
            return false;
        }

        const bookSlug = slugMatchResults[1];
        const bookResp = await window.$http.get(`/books/${bookSlug}`);
        const parser = new DOMParser();
        const pageDom = parser.parseFromString(bookResp.data, 'text/html');

        return pageDom.querySelector('body.tag-pair-changelog-required') !== null;
    }

    if (form && changelogInput) {
        form.addEventListener("submit", checkChangelogOnSubmit);
        window.addEventListener('DOMContentLoaded', () => {
            isChangelogRequired().then(required => {
                changelogRequired = required;
            });
        });
    }

    window.addEventListener('editor-tinymce::setup', event => {
        const editor = event.detail.editor;
        editor.on('init', () => {
            editor.shortcuts.remove('meta+13');
            editor.shortcuts.add('meta+13', '', () => {
                if (!isChangelogEmpty() || !changelogRequired) {
                    window.$events.emit('editor-save-page', {});
                } else {
                    window.$events.error(requiredMessage);
                }
            });
        });
    });
</script>
Dieses Script nur dann aktiv, wenn ein Buch den Tag Changelog mit dem Tagvalue required besitzt.
DOCX Dateien per Drag&Drop importieren
Das geht mit folgendem Script:
<script src="https://cdn.jsdelivr.net/npm/mammoth@1.5.1/mammoth.browser.min.js" defer></script>

<script type="module">
    // Convert the given "file" instance to HTML and insert the results
    // into the given TinyMCE "editor" instance.
    function convertAndInsertDocx(editor, file) {
        // Use a FileReader to handle conversion via an ArrayBuffer
        const reader = new FileReader();
        reader.onload = async function(loadEvent) {
            // Get and convert the ArrayBuffer version of the file
            const arrayBuffer = loadEvent.target.result;
            const {value: html, messages} = await window.mammoth.convertToHtml({arrayBuffer});
            // If warnings exists from conversion, log them to the browser console then
            // show a warning alert via BookStack's event system.
            if (messages.length > 0) {
                console.error(messages);
                window.$events.emit('warning', `${messages.length} warnings logged to browser console during conversion`);
            }
            // Insert the resulting HTML content insert the editor
            editor.insertContent(html);
        }
        reader.readAsArrayBuffer(file);
    }

    // Listen to BookStack emmitted WYSWIYG editor setup event
    window.addEventListener('editor-tinymce::setup', event => {
        // Get a reference to the editor and listen to file "drop" events
        const editor = event.detail.editor;
        editor.on('drop', event => {
            // For each of the files in the drop event, pass them, alonside the editor instance
            // to our "convertAndInsertDocx" function above if they're docx files.
            const files = event?.dataTransfer?.files || [];
            for (const file of files) {
                if (file.type === 'application/vnd.openxmlformats-officedocument.wordprocessingml.document' && window.mammoth) {
                    convertAndInsertDocx(editor, file);
                }
            }
        });
    });
</script>
Quelle: DOCX Import - Bookstack Hacks
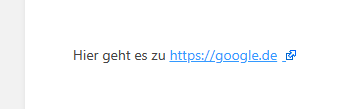
externe Links mit einem Symbol versehen
Um externe Links mit einem kleinen Symbol zu versehen muss folgender CSS Code hinterlegt werden:
<style>
a[href*="//"]:not([href*="bookstack.jelinek-rz.de"])::after {
  content: " " url(data:image/png;base64,iVBORw0KGgoAAAANSUhEUgAAAAoAAAAKCAYAAACNMs+9AAAAVklEQVR4Xn3PgQkAMQhDUXfqTu7kTtkpd5RA8AInfArtQ2iRXFWT2QedAfttj2FsPIOE1eCOlEuoWWjgzYaB/IkeGOrxXhqB+uA9Bfcm0lAZuh+YIeAD+cAqSz4kCMUAAAAASUVORK5CYII=);
  margin: 0 3px 0 5px;
}
</style>
Wenn nun ein Link einen anderen Inhalt hat wie in diesem Beispiel bookstack.jelinek-rz.de, dann wird automatisch ein Symbol rechts neben dem Link erscheinen (an allen Stellen im gesamten Bookstack).
Fußnoten über den WSYIWYG Editor
Fußnoten können mit folgendem Code aktiviert werden:
<script>
    // Take a footnote anchor and convert it to the HTML that would be expected
    // at the bottom of the page in the list of references.
    function footnoteToHtml(elem) {
        const newWrap = document.createElement('div');
        const newAnchor = document.createElement('a');
        const sup = document.createElement('sup');
        const text = document.createTextNode(' ' + elem.title.trim());
        sup.textContent = elem.textContent.trim();
        newAnchor.id = elem.getAttribute('href').replace('#', '');
        newAnchor.href = '#';
        newAnchor.append(sup);
        newWrap.append(newAnchor, text);
        return newWrap.outerHTML;
    }

    // Reset the numbering of all footnotes within the editor
    function resetFootnoteNumbering(editor) {
        const footnotes = editor.dom.select('a[href^="#bkmrk-footnote-"]');
        for (let i = 0; i < footnotes.length; i++) {
            const footnote = footnotes[i];
            const textEl = footnote.querySelector('sup') || footnote;
            textEl.textContent = String(i + 1);
        }
    }

    // Update the footnotes list at the bottom of the content.
    function updateFootnotes(editor) {
        // Filter out existing footnote blocks on parse
        const footnoteBlocks = editor.dom.select('body > div.footnotes');
        for (const blocks of footnoteBlocks) {
            blocks.remove();
        }

        // Gather our existing footnote references and return if nothing to add
        const footnotes = editor.dom.select('a[href^="#bkmrk-footnote-"]');
        if (footnotes.length === 0) {
            return;
        }

        // Build and append our footnote block
        resetFootnoteNumbering(editor);
        const footnoteHtml = [...footnotes].map(f => footnoteToHtml(f));
        editor.dom.add(editor.getBody(), 'div', {class: 'footnotes'}, '<hr/>' + footnoteHtml.join('\n'));
    }

    // Get the current selected footnote (if any)
    function getSelectedFootnote(editor) {
        return editor.selection.getNode().closest('a[href^="#bkmrk-footnote-"]');
    }

    // Insert a new footnote element within the editor at cursor position.
    function insertFootnote(editor, text) {
        const sup = editor.dom.create('sup', {}, '1');
        const anchor = editor.dom.create('a', {href: `#bkmrk-footnote-${Date.now()}`, title: text});
        anchor.append(sup);
        editor.selection.collapse(false);
        editor.insertContent(anchor.outerHTML + ' ');
    }

    function showFootnoteInsertDialog(editor) {
        const footnote = getSelectedFootnote(editor);

        // Show a custom form dialog window to edit the footnote text/label
        const dialog = editor.windowManager.open({
            title: 'Edit Footnote',
            body: {
                type: 'panel',
                items: [{type: 'input', name: 'text', label: 'Footnote Label/Text'}],
            },
            buttons: [
                {type: 'cancel', text: 'Cancel'},
                {type: 'submit', text: 'Save', primary: true},
            ],
            onSubmit(api) {
                // On submit update or insert a footnote element
                const {text} = api.getData();
                if (footnote) {
                    footnote.setAttribute('title', text);
                } else {
                    insertFootnote(editor, text);
                    editor.execCommand('RemoveFormat');
                }
                updateFootnotes(editor);
                api.close();
            },
        });

        if (footnote) {
            dialog.setData({text: footnote.getAttribute('title')});
        }
    }

    // Listen to pre-init event to customize TinyMCE config
    window.addEventListener('editor-tinymce::pre-init', event => {
        const tinyConfig = event.detail.config;
        // Add our custom footnote button to the toolbar
        tinyConfig.toolbar = tinyConfig.toolbar.replace('italic ', 'italic footnote ');
    });

    // Listen to setup event so we customize the editor.
    window.addEventListener('editor-tinymce::setup', event => {
        // Get a reference to the TinyMCE Editor instance
        const editor = event.detail.editor;

        // Add our custom footnote button
        editor.ui.registry.addToggleButton('footnote', {
            icon: 'footnote',
            tooltip: 'Add Footnote',
            active: false,
            onAction() {
                showFootnoteInsertDialog(editor);
            },
            onSetup(api) {
                editor.on('NodeChange', event => {
                    api.setActive(Boolean(getSelectedFootnote(editor)));
                });
            },
        });

        // Update footnotes before editor content is fetched
        editor.on('BeforeGetContent', () => {
            updateFootnotes(editor);
        });
    });
</script>
Das Ergebnis sieht dann wie folgt aus:
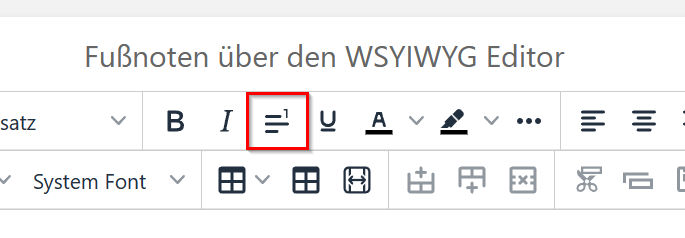
Dabei wird an der Stelle des Cursors eine Fußnote1 erstellt, welche dann am Ende der Seite eingefügt wird.
Hier gibt es auch direkt das Beispiel2 dazu.
Quelle3
Seite verbreitern
Dazu muss lediglich folgender CSS Code eingetragen werden. Die Breite kann man mit der Pixelanzahl einfach ändern.
zu breit ist aber nicht gut, da dann das Layout nicht mehr funktioniert.
<style>
@media screen and (min-width: 1400px) {
  .tri-layout-middle-contents {
      max-width: 1700px;
  }
}
.page-content { max-width: 1200px; }
</style>
Tabellenbearbeitungstools im WYSIWYG Editor aktivieren
Das klappt ganz einfach mit folgendem Code:
<script>
  window.addEventListener('editor-tinymce::pre-init', event => {
    // Get the config object
    const mceConfig = event.detail.config;

    // Create a secondary toolbar for table editing
    mceConfig.toolbar = [
      mceConfig.toolbar,
      'table tablecellprops tableinsertdialog maketableresponsive | tablemergecells tablesplitcells | tableinsertrowbefore tableinsertrowafter tabledeleterow | tablecutrow tablecopyrow tablepasterowbefore tablepasterowafter | tableinsertcolbefore tableinsertcolafter tabledeletecol | tablemergecells tablesplitcells | tablerowheader tablecolheader | tablecellbackgroundcolor | tabledelete'
    ];

    // Modify the table context toolbar
    mceConfig.table_toolbar = 'tableprops tabledelete | tableinsertrowbefore tableinsertrowafter tabledeleterow | tableinsertcolbefore tableinsertcolafter tabledeletecol | tablerowheader tablecolheader';

    // Make tables responsive by default
    mceConfig.table_sizing_mode = 'responsive';
  });

  window.addEventListener('editor-tinymce::setup', event => {
    // Get the editor
    const editor = event.detail.editor;
    // Add a button to make tables responsive
    editor.ui.registry.addButton('maketableresponsive', {
      tooltip: 'Make Table Responsive',
      icon: 'maketableresponsiveicon',
      onAction() {
        let tableElement = editor.selection.getNode();
        while (tableElement.nodeName !== 'TABLE') {
          tableElement = tableElement.parentNode;
           if (tableElement.nodeName === 'BODY') { return; }
        }
        tinymce.DOM.setStyle(tableElement, 'width', null);
        const colGroup = tableElement.getElementsByTagName('colgroup')[0];
        const cols = Array.from(colGroup.getElementsByTagName('col'));
        cols.forEach((child) => {
          tinymce.DOM.setStyle(child, 'width', null);
        });
      }
    });

    // Register a custom icon for maketableresponsive
    editor.ui.registry.addIcon('maketableresponsiveicon', `<svg xmlns="http://www.w3.org/2000/svg" width="24" height="24" fill="rgb(12.941176%,12.941176%,12.941176%)" xmlns:v="https://vecta.io/nano"><path d="M15.578 11.25H8.422l.891-1c.273-.312.246-.785-.062-1.062s-.785-.246-1.062.063l-2 2.25a.76.76 0 0 0 0 1l2 2.25c.277.309.75.336 1.063.063s.336-.75.063-1.062l-.891-1h7.156l-.887 1c-.277.313-.25.785.059 1.063s.785.246 1.063-.062l2-2.25a.79.79 0 0 0 .188-.469v-.059a.75.75 0 0 0-.191-.473l-1.996-2.25c-.277-.309-.75-.336-1.062-.062a.75.75 0 0 0-.059 1.063zM17.75 3A3.25 3.25 0 0 1 21 6.25v11.5c0 1.793-1.457 3.25-3.25 3.25H6.25C4.457 21 3 19.543 3 17.75V6.25A3.25 3.25 0 0 1 6.25 3zm1.75 3.25c0-.965-.785-1.75-1.75-1.75h-.25v5.148l-.941-1.062A1.75 1.75 0 0 0 16 8.168V4.5H8v3.668a1.75 1.75 0 0 0-.559.418L6.5 9.648V4.5h-.25c-.965 0-1.75.785-1.75 1.75v11.5c0 .965.785 1.75 1.75 1.75h.25v-5.148l.941 1.063a1.75 1.75 0 0 0 .559.418V19.5h8v-3.668a1.75 1.75 0 0 0 .559-.418l.941-1.062V19.5h.25c.965 0 1.75-.785 1.75-1.75zm0 0"/></svg>`);
  });
</script>
Das Ergebnis sieht dann wie folgt aus:

Tabellenüberschriften immer sichtbar beim scrollen
Um Tabellen-Header immer sichtbar zu haben wenn bei einer langen Tabelle gescrollt werden muss hilft der folgenden Code:
<style>
table th {
  position: sticky;
  top: 0;
  background: #eeeeee;
  font-weight: bold;
}
</style>
Transparenz für linke und rechte Spalte deaktivieren
Um den Transparenz-Effekt abzuschalten wenn ein Feld nicht im Fokus ist wird folgender Code benötigt:
<style>
.tri-layout-left-contents>*, .tri-layout-right-contents>* {
    opacity: 1 !important;
}
</style>
Überschrift h1 in PDF Exports verkleinern
Mir war die Überschrift zu groß, also habe ich diese mit folgendem Eintrag verkleinert:
<style>
.export-format-pdf h1 {
  font-size: 22px;
}
</style>
sortierbare Tabelle im Editor
Im WYSIWYG Editor kann man mit diesem Script die Spalten in Tabellen mit einem Doppelklick auf den Header nach diesem sortieren. Die anderen Spalten werden entsprechend mitsortiert.
<script>

    // Hook into the WYSIWYG editor setup event and add our logic once loaded
    window.addEventListener('editor-tinymce::setup', event => {
        const editor = event.detail.editor;
        setupTableSort(editor);
    });

    // Setup the required event handler, listening for double-click on table cells.
    function setupTableSort(editor) {
        editor.on('dblclick', event => {
             const target = event.target;
             const parentHeader = target.closest('table tr:first-child td, table tr:first-child th');
             if (parentHeader) {
                 // Sort out table within a transaction so this can be undone in the editor if required.
                 editor.undoManager.transact(() => {
                     sortTable(parentHeader, editor);
                 });
             }
        });
    }

    // Sort the parent table of the given header cell that was clicked.
    function sortTable(headerCell) {
        const table = headerCell.closest('table');
        // Exit if the table has a header row but the clicked cell was not part of that header
        if (table.querySelector('thead') && headerCell.closest('thead') === null) {
            return;
        }

        const headerRow = headerCell.parentNode;
        const headerIndex = [...headerRow.children].indexOf(headerCell);
        const tbody = table.querySelector('tbody');
        const rowsToSort = [...table.querySelectorAll('tbody tr')].filter(tr => tr !== headerRow);
        const invert = headerCell.dataset.sorted === 'true';

        // Sort the rows, detecting numeric values if possible.
        rowsToSort.sort((a, b) => {
            const aContent = a.children[headerIndex].textContent.toLowerCase();
            const bContent = b.children[headerIndex].textContent.toLowerCase();
            const numericA = Number(aContent);
            const numericB = Number(bContent);

            if (!Number.isNaN(numericA) && !Number.isNaN(numericB)) {
                return invert ? numericA - numericB : numericB - numericA;
            }

            return aContent === bContent ? 0 : (aContent < bContent ? (invert ? 1 : -1) : (invert ? -1 : 1));
        });

        // Re-append the rows in order
        for (const row of rowsToSort) {
            tbody.appendChild(row);
        }

        // Update the sorted status for later possible inversion of sort.
        headerCell.dataset.sorted = invert ? 'false' : 'true';
    }
</script>
numerierte Überschriften
wer gerne mit numerierten Überschritften arbeitet, für den Könnte diese beiden Code Blöcke hilfreich sein:
mit Prüfung auf einen Tag
Prüfung ob Tag auf einem Buch gesetzt ist
Mit diesem Javascript wird geprüft, ob ein bestimmtes Tag-Paar auf dem Buch gesetzt ist. Das Tag-Paar lautet numbered-active:
<script type="module">
	async function isNumberTagPresent(documentToCheck) {
		const bookSlugRegex = /\/books\/(.*?)\/(page|draft)\//;
		const slugMatchResults = bookSlugRegex.exec(window.location.href);
		if (slugMatchResults === null) {
			return false;
		}

		const bookSlug = slugMatchResults[1];
		const bookResp = await window.$http.get(`/books/${bookSlug}`);
		const parser = new DOMParser();
		const pageDom = parser.parseFromString(bookResp.data, 'text/html');

		// Check for the tag in the provided document
		return pageDom.querySelector('body.tag-pair-numbered-active') !== null;
	}

	async function toggleCssClass() {
		const isRequired = await isNumberTagPresent(document);
		if (isRequired) {
			document.body.classList.add('numbered-active');
		} else {
			document.body.classList.remove('numbered-active');
		}

		// Check if there are iframes in the document
		const iframes = document.querySelectorAll('iframe');
		for (const iframe of iframes) {
			if (iframe.contentDocument) {
				const isIframeRequired = await isNumberTagPresent(iframe.contentDocument);
				if (isIframeRequired) {
					iframe.contentDocument.body.classList.add('numbered-active');
				} else {
					iframe.contentDocument.body.classList.remove('numbered-active');
				}
			}
		}
	}

	document.addEventListener("DOMContentLoaded", function() {
		toggleCssClass();
	});
</script>
Ist der Tag gesetzt wird in die HTML "body"-Elemente eine Klasse geschrieben, die dann im folgenden CSS abgefragt wird.
CSS nur setzen wenn CSS-Klasse vorhanden
Hier wird nun die numerierte Liste erstellt, aber nur wenn im HTML "body"-Element die entsprechende Klasse vorher mittels Javascript reingeschrieben wurde.
<style>
    body.numbered-active, body.mce-content-body {
        counter-reset: h1counter;
    }
    body.numbered-active .page-content, body.numbered-active.mce-content-body {
        counter-reset: h2counter;
        counter-increment: h1counter;
    }
    body.numbered-active .page-content h1:not(.break-text):before, body.numbered-active.mce-content-body h1:not(.break-text):before {
        content: counter(h1counter) ".\0000a0\0000a0";
        counter-increment: h1counter;
    }
    body.numbered-active .page-content h1, body.numbered-active.mce-content-body h1 {
        counter-reset: h2counter;
    }

    body.numbered-active .page-content h2:before, body.numbered-active.mce-content-body h2:before {
        content: counter(h2counter) ".\0000a0\0000a0";
        counter-increment: h2counter;
    }
    body.numbered-active .page-content h2, body.numbered-active.mce-content-body h2 {
        counter-reset: h3counter;
    }

    body.numbered-active .page-content h3:before, body.numbered-active.mce-content-body h3:before {
        content: counter(h2counter) "." counter(h3counter) ".\0000a0\0000a0";
        counter-increment: h3counter;
    }
    body.numbered-active .page-content h3, body.numbered-active.mce-content-body h3 {
        counter-reset: h4counter;
    }

    body.numbered-active .page-content h4:before, body.numbered-active.mce-content-body h4:before {
        content: counter(h2counter) "." counter(h3counter) "." counter(h4counter) ".\0000a0\0000a0";
        counter-increment: h4counter;
    }
    body.numbered-active .page-content h4, body.numbered-active.mce-content-body h4 {
        counter-reset: h5counter;
    }

    body.numbered-active .page-content h5:before, body.numbered-active.mce-content-body h5:before {
        content: counter(h2counter) "." counter(h3counter) "." counter(h4counter) "." counter(h5counter) ".\0000a0\0000a0";
        counter-increment: h5counter;
    }
</style>
Ohne Prüfung auf einen Tag (für alle Inhalte)
<style>
    body {
        counter-reset: h1counter;
    }
    body.page-content.mce-content-body {
        counter-reset: h2counter;
        counter-increment: h1counter;
    }
    .page-content h1:not(.break-text):before {
        content: counter(h1counter) ".\0000a0\0000a0";
        counter-increment: h1counter;
    }
    .page-content h1 {
        counter-reset: h2counter;
    }

    .page-content h2:before {
        content: counter(h2counter) ".\0000a0\0000a0";
        counter-increment: h2counter;
    }
    .page-content h2 {
        counter-reset: h3counter;
    }

    .page-content h3:before {
        content: counter(h2counter) "." counter(h3counter) ".\0000a0\0000a0";
        counter-increment: h3counter;
    }
    .page-content h3{
            counter-reset: h4counter;
    }

    .page-content h4:before {
        content: counter(h2counter) "." counter(h3counter) "." counter(h4counter) ".\0000a0\0000a0";
        counter-increment: h4counter;
    }
    .page-content h4 {
        counter-reset: h5counter;
    }

    .page-content h5:before {
        content: counter(h2counter) "." counter(h3counter) "." counter(h4counter) "." counter(h5counter) ".\0000a0\0000a0";
        counter-increment: h5counter;
    }
</style>
Hintergrund anpassen
Es gibt ebenfalls eine Möglichkeit den Hintergrund von Bookstack anzupassen, dazu ist folgender Code nötig:
<style>
html {
  height: auto;
  background-color: #fff;
}

html.dark-mode {
  background-color: #000;
}

body:not(#tinymce) {
  background:
    linear-gradient(to bottom, rgba(255, 255, 255, 0) 80%, rgba(255, 255, 255, 1) 100%),
    url(https://bookstack.jelinek-rz.de/uploads/images/gallery/2024-06/default-symmetrical-geometric-shapes-red-yellow-and-light-gree-2.jpg) top / 100% 100vh no-repeat fixed;
  background-color: #fff;
}

.dark-mode body:not(#tinymce) {
  background-color: #000;
  background:
    linear-gradient(to bottom, rgba(0, 0, 0, 0) 80%, rgba(0, 0, 0, 1) 100%),
    url(https://bookstack.jelinek-rz.de/uploads/images/gallery/2024-06/default-symmetrical-geometric-shapes-red-yellow-and-light-gree-2.jpg) top / 100% 100vh no-repeat fixed;
}

.page-content .cm-editor:not(.dark-mode .cm-editor) {
  background-color: #F4F4F4;
}

.page-content hr {
  height: 2px;
}

#content #main-content.height-fill {
  height: 90vh !important;
}

.tri-layout-right, .tri-layout-left, .page-edit-toolbar {
  background-color: rgba(255, 255, 255, .74);
  border-radius: 8px;
  border-style: solid;
  border-width: 0px;
  border-color: rgb(229, 231, 235);
  box-shadow: rgba(0, 0, 0, 0) 0px 0px 0px 0px, rgba(0, 0, 0, 0) 0px 0px 0px 0px, rgba(0, 0, 0, 0.1) 0px 4px 6px -1px, rgba(0, 0, 0, 0.1) 0px 2px 4px -2px;
  box-sizing: border-box;
  backdrop-filter: blur(20px);
  margin-top: 35px;
}

.tri-layout-right, .tri-layout-left {
  height: 90%;
}

.dark-mode .tri-layout-right, .dark-mode .tri-layout-left, .dark-mode .page-edit-toolbar {
  background-color: rgba(0, 0, 0, .74);
  border-radius: 8px;
  border-style: solid;
  border-width: 0px;
  border-color: rgb(229, 231, 235);
  box-shadow: rgba(0, 0, 0, 0) 0px 0px 0px 0px, rgba(0, 0, 0, 0) 0px 0px 0px 0px, rgba(0, 0, 0, 0.1) 0px 4px 6px -1px, rgba(0, 0, 0, 0.1) 0px 2px 4px -2px;
  box-sizing: border-box;
  backdrop-filter: blur(20px);
  margin-top: 35px;
}

.dark-mode #main-content > div:nth-child(1) > nav {
  background-color: rgba(0, 0, 0, .74);
  border-radius: 8px;
  opacity: 1;
}

@media (min-width: 1750px) {
  .tri-layout-sides-content {
    grid-template-columns: 1.5fr 4fr 1.5fr !important;
  }
}

@media (max-width: 1400px) {
  div#sidebar.tri-layout-left.print-hidden {
    display: none;
  }
}

@media (max-width: 1000px) {
  .tri-layout-right {
margin-top: auto;
    }
      .tri-layout-container.show-info .tri-layout-right>*, .tri-layout-container.show-info .tri-layout-left>* {
        padding: 20px;
        margin-bottom: 40px;
        }
}


@media screen and (min-width: 1000px) {
  .tri-layout-left-contents>*, .tri-layout-right-contents>* {
    padding: 10px;
  }
}

#sibling-navigation {
  background-color: rgba(255, 255, 255, .6);
  border-radius: 8px;
  opacity: 1;
  backdrop-filter: blur(20px);
}

.dark-mode #sibling-navigation {
  background-color: rgba(0, 0, 0, .74);
  border-radius: 8px;
  color: #fff;
  opacity: 1;
  backdrop-filter: blur(20px);
}

.dark-mode #sibling-navigation a .text-muted {
  color: #fff !important;
}

.dark-mode .comments-container {
  border-radius: 8px;
  background-color: rgba(0, 0, 0, .74);
  padding: 30px 20px;
}

.dark-mode .comments-container button {
  background-color: rgba(0, 0, 0, .74);
  color: #fff !important;
}

.tri-layout-right-contents>*, .tri-layout-left-contents>* {
  opacity: 1 !important;
}

.button {
  background-color: rgba(255, 255, 255, .74);
}

button[type="submit"]:not(.icon-list-item, [aria-label="Search"]) {
  background-color: #000 !important;
}

#login-form button {
  background-color: #000;
}
</style>
Inhaltsverzeichnis im Editor im Kommentarfeld anzeigen
<script>
const generateTOC = () => {
    let out = document.createElement('div');
    out.id = "hack-toc-editor";
    // Bookstack doesn't use h1 inside the editor, only h2-h6
    let list = document.createElement('ul');
    let previousLevel = 2;
    let currentList = list;
    for (const x of tinymce.activeEditor.getBody().querySelectorAll('h2,h3,h4,h5,h6')) {
        // Create our link to content
        let link = document.createElement('a');
        link.setAttribute('data-id', x.id);
        link.textContent = x.textContent;
        link.addEventListener('click', onLinkClicked);
        let li = document.createElement('li');
        li.append(link);


        // Now let's find out where we insert it
        let level = Number(x.tagName.toLowerCase().replace('h', ''));
        // We need to go deeper, let's create new level(s)
        // Will be triggered only if level > previousLevel
        for(let i = previousLevel; i < level; i++) {
            let newList = document.createElement('ul');
            currentList.append(newList);
            currentList = newList;
        }
        // We need to go back one (or more) level(s)
        // Will be triggered only if level < previousLevel
        for(let i = previousLevel; i > level; i--) {
            currentList = currentList.parentElement;
        }
        // Now, let's append our link at the right place
        currentList.append(li);
        previousLevel = level;
    }
    out.append(list);
    return out;
}
// Add TOC content inside comment sidebar
const populateTOC = () => {
    document.querySelector('.comment-container-compact').append(generateTOC());
}

const scrollToHeader = (id) => {
    // querySelector doesn't work for some ID which contains accentued characters, so use getElementByID which works fine
    tinymce.activeEditor.getDoc().getElementById(id).scrollIntoView();
}
const onLinkClicked = (event) => {
    let id = event.target.getAttribute('data-id');
    scrollToHeader(id);
}
// It's ugly bit it works : just wait until we find tinyMCE to populate ToC !
const checkForTiny = () => {
    if (window?.tinymce?.activeEditor?.getDoc()) {
        populateTOC();
    }
    else {
        setTimeout(checkForTiny, 1000);
    }
}

setTimeout(checkForTiny, 1000);
</script>
Dynamic Glossary
<script type="module">
    // The URL path to the default glossary page in your instance.
    // You should only need to change the "my-book" and "main-glossary"
    // parts, keep the other parts and the general format the same.
    const defaultGlossaryPage = '/books/glossar/page/glossar';

    // Get a normalised URL path, check if it's a glossary page, and page the page content
    const urlPath = window.location.pathname.replace(/^.*?\/books\//, '/books/');
    const isGlossaryPage = urlPath.endsWith('/page/glossar') || urlPath.endsWith(defaultGlossaryPage);
    const pageContentEl = document.querySelector('.page-content');

    if (isGlossaryPage && pageContentEl) {
        // Force re-index when viewing glossary pages
        addTermMapToStorage(urlPath, domToTermMap(pageContentEl));
    } else if (pageContentEl) {
        // Get glossaries and highlight when viewing non-glossary pages
        document.addEventListener('DOMContentLoaded', () => highlightTermsOnPage());
    }

    /**
     * Highlight glossary terms on the current page that's being viewed.
     * In this, we get our combined glossary, then walk each text node to then check
     * each word of the text against the glossary. Where exists, we split the text
     * and insert a new glossary term span element in its place.
     */
    async function highlightTermsOnPage() {
        const glossary = await getMergedGlossariesForPage(urlPath);
        const trimRegex = /^[.?:"',;]|[.?:"',;]$/g;
        const treeWalker = document.createTreeWalker(pageContentEl, NodeFilter.SHOW_TEXT);
        while (treeWalker.nextNode()) {
            const node = treeWalker.currentNode;
            const words = node.textContent.split(' ');
            const parent = node.parentNode;
            let parsedWords = [];
            let firstChange = true;
            for (const word of words) {
                const normalisedWord = word.toLowerCase().replace(trimRegex, '');
                const glossaryVal = glossary[normalisedWord];
                if (glossaryVal) {
                    const preText = parsedWords.join(' ');
                    const preTextNode = new Text((firstChange ? '' : ' ') + preText + ' ');
                    parent.insertBefore(preTextNode, node)
                    const termEl = createGlossaryNode(word, glossaryVal);
                    parent.insertBefore(termEl, node);
                    const toReplace = parsedWords.length ? preText + ' ' + word : word;
                    node.textContent = node.textContent.replace(toReplace, '');
                    parsedWords = [];
                    firstChange = false;
                    continue;
                }

                parsedWords.push(word);
            }
        }
    }

    /**
     * Create the element for a glossary term.
     * @param {string} term
     * @param {string} description
     * @returns {Element}
     */
    function createGlossaryNode(term, description) {
        const termEl = document.createElement('span');
        termEl.setAttribute('data-term', description.trim());
        termEl.setAttribute('class', 'glossary-term');
        termEl.textContent = term;
        return termEl;
    }

    /**
     * Get a merged glossary object for a given page.
     * Combines the terms for a same-book & global glossary.
     * @param {string} pagePath
     * @returns {Promise<Object<string, string>>}
     */
    async function getMergedGlossariesForPage(pagePath) {
        const [defaultGlossary, bookGlossary] = await Promise.all([
            getGlossaryFromPath(defaultGlossaryPage),
            getBookGlossary(pagePath),
        ]);

        return Object.assign({}, defaultGlossary, bookGlossary);
    }

    /**
     * Get the glossary for the book of page found at the given path.
     * @param {string} pagePath
     * @returns {Promise<Object<string, string>>}
     */
    async function getBookGlossary(pagePath) {
        const bookPath = pagePath.split('/page/')[0];
        const glossaryPath = bookPath + '/page/glossary';
        return await getGlossaryFromPath(glossaryPath);
    }

    /**
     * Get/build a glossary from the given page path.
     * Will fetch it from the localstorage cache first if existing.
     * Otherwise, will attempt the load it by fetching the page.
     * @param path
     * @returns {Promise<{}|any>}
     */
    async function getGlossaryFromPath(path) {
        const key = 'bsglossary:' + path;
        const storageVal = window.localStorage.getItem(key);
        if (storageVal) {
            return JSON.parse(storageVal);
        }

        let resp = null;
        try {
            resp = await window.$http.get(path);
        } catch (err) {
        }

        let map = {};
        if (resp && resp.status === 200 && typeof resp.data === 'string') {
            const doc = (new DOMParser).parseFromString(resp.data, 'text/html');
            const contentEl = doc.querySelector('.page-content');
            if (contentEl) {
                map = domToTermMap(contentEl);
            }
        }

        addTermMapToStorage(path, map);
        return map;
    }

    /**
     * Store a term map in storage for the given path.
     * @param {string} urlPath
     * @param {Object<string, string>} map
     */
    function addTermMapToStorage(urlPath, map) {
        window.localStorage.setItem('bsglossary:' + urlPath, JSON.stringify(map));
    }

    /**
     * Convert the text of the given DOM into a map of definitions by term.
     * @param {string} text
     * @return {Object<string, string>}
     */
    function domToTermMap(dom) {
        const textEls = Array.from(dom.querySelectorAll('p,h1,h2,h3,h4,h5,h6,blockquote'));
        const text = textEls.map(el => el.textContent).join('\n');
        const map = {};
        const lines = text.split('\n');
        for (const line of lines) {
            const split = line.trim().split(':');
            if (split.length > 1) {
                map[split[0].trim().toLowerCase()] = split.slice(1).join(':');
            }
        }
        return map;
    }
</script>
<style>
/**
* These are the styles for the glossary terms and definition popups.
* To keep things simple, the popups are not elements themselves, but
* pseudo ":after" elements on the terms, which gain their text via
* the "data-term" attribute on the term element.
*/
.page-content .glossary-term {
text-decoration: underline;
text-decoration-style: dashed;
text-decoration-color: var(--color-link);
text-decoration-thickness: 1px;
position: relative;
cursor: help;
}
.page-content .glossary-term:hover:after {
display: block;
}
.page-content .glossary-term:after {
position: absolute;
content: attr(data-term);
background-color: #FFF;
width: 200px;
box-shadow: 0 1px 6px 0 rgba(0, 0, 0, 0.15);
padding: 0.5rem 1rem;
font-size: 12px;
border-radius: 3px;
z-index: 9999;
top: 2em;
inset-inline-start: 0;
display: none;
}
.dark-mode .page-content .glossary-term:after {
background-color: #000;
}
.page-content table td, .page-content table th {
position: relative;
overflow: visible;
}
</style>
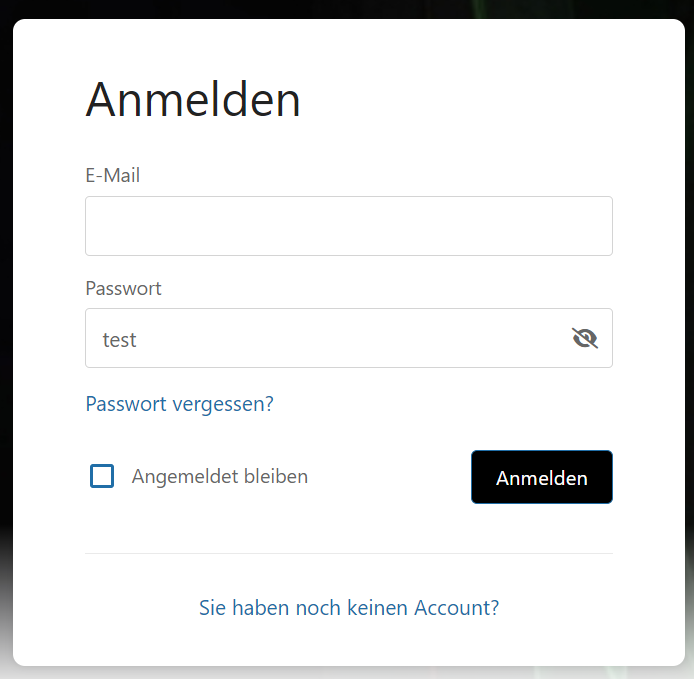
Passwort beim Login mit "Auge" sichtbar machen
Mit der folgenden Anpassung lässt sich ein Schalter implementieren mit dem man das Passwort im Passwortfeld sichtbar machen kann.
<style>
.password-toggle {
    position: relative;
}
.password-toggle input[type="password"] {
    padding-right: 40px;
}
.password-eye {
    position: absolute;
    right: 10px;
    top: 50%;
    transform: translateY(-50%);
    cursor: pointer;
    color: #666;
}
</style>
<script>
document.addEventListener('DOMContentLoaded', function() {
    const passwordFields = document.querySelectorAll('input[type="password"]');
    passwordFields.forEach(function(field) {
        const wrapper = document.createElement('div');
        wrapper.className = 'password-toggle';
        field.parentNode.insertBefore(wrapper, field);
        wrapper.appendChild(field);

        const eye = document.createElement('i');
        eye.className = 'fas fa-eye password-eye';
        eye.onclick = function() {
            if (field.type === 'password') {
                field.type = 'text';
                eye.classList.remove('fa-eye');
                eye.classList.add('fa-eye-slash');
            } else {
                field.type = 'password';
                eye.classList.remove('fa-eye-slash');
                eye.classList.add('fa-eye');
            }
        };
        wrapper.appendChild(eye);
    });
});
</script>
<link rel="stylesheet" href="https://cdnjs.cloudflare.com/ajax/libs/font-awesome/6.0.0/css/all.min.css">
Das Loginfeld sieht dann wie folgt aus: